Showing posts with label cake. Show all posts

Wednesday, September 20, 2023

Pumpkin Dump Cake

For the love of Fall!

The first time I had this delicious dessert was at my neighbor's house during a fun, fall, neighborhood get-together. It was amazing!

This quick and easy dump cake has all the warm and fuzzy fall flavors we crave during that time of year. In fact, you may just want to skip the Pumpkin Pie at your Thanksgiving feast and serve this delicious dump cake. I'm thinking that's a plan this year. 

Ingredients:
15 oz. can pumpkin puree
12 oz. evaporated milk
3 large eggs
3/4 cup light brown sugar (lightly packed)
2 tsp. pumpkin pie spice
1/2 tsp. salt
15.25 box yellow cake mix (dry)
1 cup pecans (coarsely chopped)
1 cup unsalted butter (melted)

Instructions:

Preheat oven to 350'F. Prepare the inside of a 9x13" baking pan with nonstick cooking spray.

Whisk together the pumpkin, milk, eggs, brown sugar, pumpkin pie spice and salt to a large bowl. Pour into prepared pan.

Sprinkle the dry cake mix evenly across the top, then sprinkle on the chopped pecans.

Drizzle the melted butter on the top, being careful not to leave dry patches of cake mix.

Bake at 350'F. for 45-60 minutes or until set in the center and golden brown on top. (If it's starting to get too brown before fully baked, cover the top with a foil tent.)

Let sit for about 15 minutes before serving. You can cut into squares or use a large spoon and scoop it out. 

Top with vanilla ice cream or whipped cream. 

A Tip from Grammy:
-Be sure to use pumpkin puree and NOT pumpkin pie filling.
-Spice cake mix can be substituted for the yellow cake mix.
-The pecans can be substituted with walnuts, if desired. Don't like nuts? Just leave them out entirely.
-Refrigerate leftovers up to 3 days in a tightly covered container
-Prepare, bake, cool and chill covered cake in the refrigerator a day in advance. 

Wednesday, July 5, 2023

Pineapple Upside-Down Cake

Classic, easy and always delicious!


Make your family and friends happy with this classic and easy pineapple upside-down cake! They'll love the fruity, gooey, caramelized yumminess of this dessert that has been handed down for generations. We're saving some time using a cake mix, but I promise you won't lose any of the flavor!

Yes, I'm going back to the good 'ol days, but let's face it, some of those "good 'ol" recipes never really get "old"! 

Ingredients:
1/2 cup butter
1 cup packed brown sugar
1 can (20 oz.) pineapple slices in juice, drained, juice reserved
1 jar (6 oz.) maraschino cherries without stems, drained
1 (15.25 oz.) box your favorite yellow cake mix 
Vegetable oil and eggs called for on cake mix box

Instructions:
Heat oven to 350°F (325°F for dark or nonstick pan). 

In 13x9-inch pan, melt butter in oven. Sprinkle brown sugar evenly over butter. Arrange pineapple slices on brown sugar. Place cherry in center of each pineapple slice, and arrange remaining cherries around slices; press gently into brown sugar.

Add enough water to reserved pineapple juice to measure 1 cup. Make cake batter as directed on box, substituting pineapple juice mixture for the water. Pour batter over pineapple and cherries. (If using a Pineapple cake mix, exclude pineapple juice and just use 1 cup water)

Bake 40 to 45 minutes (44 to 53 minutes for dark or nonstick pan) or until toothpick inserted in center comes out clean. Immediately run knife around side of pan to loosen cake. 

Place heatproof serving plate upside down onto pan; turn plate and pan over. Leave pan over cake 5 minutes so brown sugar topping can drizzle over cake; remove pan. Cool 30 minutes. 

Serve warm or cool. 


Yields: about 12 servings 

Tips from Grammy:
-Serve with whipped topping or plain.
-Don't worry about inverting it over onto the serving plate. Just place the serving plate upside-down over the cake in the pan, grasp firmly and flip in one quick motion. You can do it! 


Be encouraged!
Therefore, there is now no condemnation for those who are in Christ Jesus. -Romans 8:1


Thursday, May 21, 2020

Funny Cake

Pennsylvania Dutch Funny Cake

Fun to make and even more fun to eat! 


They say this delicious breakfast cake gets its name "Funny Cake" because the chocolate is added last and was meant to stay on top of the cake filling. But during the cooking process the chocolate and cake filling flipped positions. I guess it made the baker laugh! 

My best friend, Sandy, grew up in PA and gave me this unique and delicious recipe after she served it to us one morning with breakfast.  Let me tell you, chocolate for breakfast is pretty awesome! Haha!

Ingredients:

Syrup:
1/2 c. sugar
1/2 c. hot water
1/4 c. unsweetened baking cocoa
1/2 tsp. vanilla

Creamed Mixture:
1 c. sugar
1 egg
1/4 c. oil
1/2 c. milk
1/2 tsp. vanilla
1 c. flour
1/2 tsp. salt
1 tsp. baking powder
1 (9") unbaked pie crust

Preheat oven to 375 degrees.

To make chocolate syrup:
Mix 1/2 cup sugar, hot water, cocoa and 1/2 tsp. vanilla; set aside.

For Creamed Mixture:
Cream together 1 cup sugar, egg and oil.

Add milk, 1/2 tsp. vanilla, flour, salt and baking powder.  Beat well.

Pour creamed mixture into on 9 inch unbaked pie shell, then pour the chocolate syrup over the top.

Bake at 375' for 45-50 minutes until golden brown on top.

Serve with breakfast!


Be encouraged!
"The fruit of the Spirit is love, joy, peace...gentleness, self-control.  -Galatians 5:22-23

Sunday, August 14, 2016

Peach Cobbler Dump Cake

A peach of a dessert!


I seriously couldn't believe how easy this was to make...I've never made a "dump" cake before, but I will definitely be making more of them!

The family loves peach cobbler, but I've only made it once and wasn't that pleased with it. So every summer, we take a trip to our local peach farm and make sure we have our homemade peach cobbler before we leave with our load of peaches, veggies and other goodies.

But, this year we just couldn't get there, so I went searching for a cobbler recipe and found a whole list of it made with this dump method.  Using the information I read about it, I added some extra peaches and spices, knowing that's what my crew would love.

It was a big hit!  My granddaughter's first words after tasting it were, "Wow, Grandma! 
This is even better than the one at the peach farm!"  Gotta love grandkids, huh?

Ingredients:
2 (15.5oz) cans sliced peaches in heavy syrup
2 (15.5 oz.) can sliced peaches in heavy syrup, drained
1 (18.25) box yellow cake mix
1 stick butter, cold, sliced into 16 pieces
3/4 cup brown sugar
1 tsp. cinnamon (optional)
1/2 cup pecans (optional)

Preheat oven to 350'F.

Spray bottom of a 9x13" baking pan.  

Using the juice and peaches of two cans, pour into baking dish.  Then drain the liquid from the third can of peaches; using only the peaches.  (This added more fruit without adding too much liquid.)

Cover with the dry (Yes, you heard me right...I said "dry") cake mix and spread evenly over the peaches.  Press lightly onto the peaches.  

Cut cold butter into 16 small pieces and place on top of the cake mix. 

Sprinkle brown sugar and cinnamon over the top. 

Add chopped pecans, if desired.

Bake at 350'F for 40-45 minutes until bubbly and when touched, the cake feels firm.

Serve warm with vanilla ice cream or whipped topping!


Be encouraged!
 And everyone who calls on the name of the Lord will be saved.   -Acts:2:21


Saturday, July 16, 2016

Chocolate Mayonnaise Cake

Decadent, delicious and easy!

Looking through my mom's recipe box, I found some great old recipes...oldies but goodies! It was like a treasure hunt and I came across my favorite childhood cake...Chocolate Mayonnaise Cake.   Anyone else remember this classic from long ago?

Anyway, the spirit of "must bake now" pulled me into the kitchen and I started feverishly working on this cake.  Yes, it was going to be just like I remembered, my mind dreamed of eating that first piece and falling back into my childhood! Ahhh!

I couldn't wait to get it into the oven and I was on full speed ahead.  Well, great plans, and daydreams, don't always go as we would wish. I don't recommend this speed when baking!  

So, you know what's coming...my masterpiece came out flat and hard, looked and tasted pretty bad, but what did I do wrong?  I followed the recipe exactly, right? Wrong!  You can't leave out the baking powder and soda...ugh, a rookie mistake. But, that wasn't going to stop me...I began again (I really wanted this cake).


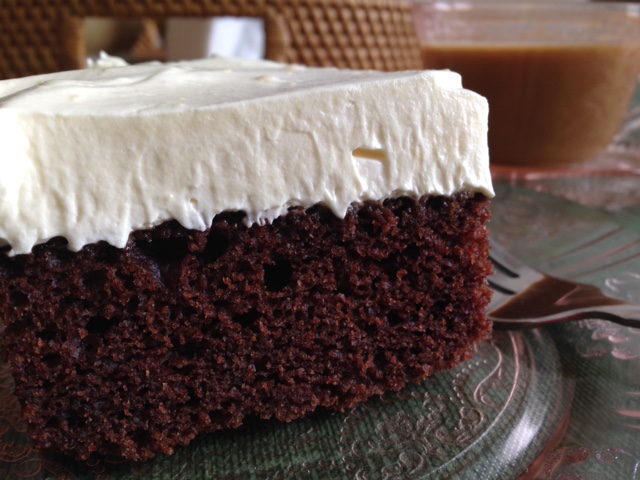
The results of not giving up were totally worth it.  It brought me back to my childhood and I enjoyed every bite of the best chocolate cake ever!  Beautiful texture, light, fluffy, moist and delicious!  It's all there in every bite, and the Fluffy Cool Whip Frosting was an added bonus because it really brought out the flavor of the cake. 

I added the recipe for the Cool Whip Frosting below...you're welcome! LOL!

Ingredients:
2 cups flour
1 cup sugar
4 Tbsp. unsweetened cocoa powder
2 tsp. baking powder
1 tsp. baking soda
1/8 tsp. salt
1 cup real mayonnaise (not salad dressing)
1 cup cold water
1 tsp. vanilla


Preheat oven to 350°F.  Spray with cooking spray or grease and flour 13x9 inch baking pan or 2-9" round pans.

In a mixing bowl, sift together flour, sugar, cocoa, baking powder, baking soda and salt.

Add mayonnaise, vanilla and water.  Beat until smooth and well-blended, about 2 minutes on medium.

Pour batter into a prepared pan(s).

Bake at 350' for 28-30 minutes (9" round pans) or 30-35 minutes (13x9").  Cake is done when middle springs back when touched or toothpick inserted in the middle comes out clean. Careful not to over-bake or it will be dry.

Cool before frosting with your favorite Buttercream, 7-Minute Frosting or Chocolate Frosting...or just dollop with whipped cream and confectioners' sugar.  The cake is the star!

Vanilla Cool Whip Frosting:
1 (3.5) pkg. of instant vanilla pudding
1/4 cup confectioners' sugar
1 cup milk
1 (8oz) tub whipped topping

Combine pudding, confectioners' sugar and milk in bowl; beat for about a minute. Fold in whipped topping.


Be encouraged! 
"He has shown you, o man, what is good.  And what does he require of you?  To act justly, love mercy, and to walk humbly with your God!"  Micah 6-8


Friday, June 24, 2016

Vanilla Wafer Cake

What a treat!


We all love this cake!

It's a sweet, dense, moist cake that needs no frosting and has tons of flavor!  It's wonderful with a cup of coffee or glass of milk!   Add a dollup of whipped cream and strawberries...and you have the perfect dessert!

This is another recipe I'd never heard of until we moved south, I really hope all my northern friends will try it. Y'all will love it!  

Ingredients:

1 cup butter (2 sticks) softened
2 cups sugar
6 eggs
1 (12 oz.) box of vanilla wafers
1/2 cup milk
1 (7 oz.) pkg. flaked coconut
1 cup pecans, finely chopped

Preheat oven to 325'F.  Generously grease and flour a tube pan. (Don't use a spray, it doesn't work.)

Crush vanilla wafers with food processor or place them in a plastic bag and use a rolling pin. (That's what I did...easy peasy!)

Cream butter and sugar together in bowl; add eggs, one at a time, beating batter after each one.  Add crushed vanilla wafers alternately with milk, ending with the wafers.  Stir in coconut and pecans.

Pour into the well-greased and floured tube or bundt pan and bake for 1 hour and 15 minutes (approx).  Test for doneness with a toothpick.


"Only as we walk in the close and constant fellowship with the Lord, can He communicate the knowledge of His will to us." - G. Christian Weiss


Sunday, March 6, 2016

White Layer Cake with Lemon Filling and Mascarpone Frosting

Easy, delicious and impressive!

I enjoy "doctoring up" cake mixes, so I always try to keep a few different flavors on hand in the pantry.  Yesterday, I noticed a white cake mix, lemon pie filling and I had a container of mascarpone cheese that was nearing its' expiration date.  Okay, I had to do something, because there's no way I'm throwing away $8 worth of Italian cream cheese.

I would have added blueberries to the cake, but I had already eaten those.  Haha! Did I ever mention how much I love blueberries?  I eat them like I'm popping peanuts in my mouth. 

But, I digress. 

I was going to try to mix them all together, but then, I just felt like being a little fancy and the result was a hit.  I even broke out my piping bags and decorated a bit.  Of course, this is purely optional, especially since it doesn't affect the taste of this delicious cake. LOL!

The cake is half gone already and they're already wanting to know when I'll make this again.  You gotta love a last minute dessert!  

Now, you can make your own lemon curd filling, and white cake, if you'd rather.  But, like I said, this was a last minute decision to use what was already there.  Judging from the family's reaction, I would make this again...for sure!  Haha!


Ingredients:
1 box Classic White cake mix-bake according to package directions.
1 can Comstock Lemon Pie Filling

Frosting:                                                 
8 oz. cream cheese
8 oz. mascarpone
1/2 c. (1 stick) butter, softened
2-2 1/2 cups confectioners' sugar
pinch Kosher salt
1 tsp. vanilla
Heavy cream (to make spreading consistency)

In the large bowl of an electric mixer fitted with the paddle attachment, beat the butter, cream cheese, salt and powdered sugar on medium-high speed until light and fluffy. You may want to add small amounts of heavy cream here.  Beat in the mascarpone on very low speed until just combined. (Be careful; once you've added the mascarpone, excessive beating can make the frosting curdle.) 

Stir in the vanilla extract.

Tip:  If you'd like a little more lemon flavor, add 1 tsp. lemon juice instead of the vanilla to the frosting. 


Be encouraged!
"When Christ, who is your life, appears, then you also will appear with him in glory." - Colossians 3:4

Saturday, January 23, 2016

Bonnie Butter Cake

A real all-butter cake

One of my husband's favorite cakes is a butter cake with chocolate frosting.  In fact, it's pretty much a favorite with just about everyone.  I have to say, though, a yellow cake mix just doesn't have the same "pure" flavor that a homemade one does.  So, when I make this, I always make it from scratch.  This is one of the best and most flavorful butter cakes.

Yesterday, we were watching a TV show that featured cakes and my granddaughter, who just had a beautiful baby girl, said, "Grandma, I need cake!"  Well, that's all I needed to hear since she did such a great job giving me another gorgeous great-granddaughter.  

She and her cousin, Becky are making this great-grandma very happy.  This morning, Becky video chatted me from her home in NJ and I got to play Facetime Peekaboo with my Kendall, my first great grandchild.  Life is good and I'm so thankful for all the modern technology that allows me to do such things.

Here are pictures of my two latest loves!    Cutest little cousins ever!  Yes, I'm obsessed with both of them...sigh!   
Kendall
Anna-Molly
 
Oh, yeah, you came here for a recipe!  Haha!  Well, here it is!

Ingredients:

2/3 cup butter, softened
1 3/4 cup sugar
3 eggs
1 1/2 tsp. vanilla
2 3/4 cups all-purpose flour
2 1/2 tsp. baking powder
1 tsp. salt
1 1/4 cup whole milk

Heat oven to 350'F.

Grease and flour baking pan, 13x9x2" or two 9" or three 8" round pans.

In large mixing bowl, beat butter, sugar, eggs and vanilla until fluffy.  Continue beating for 5 minutes on high speed, scraping bowl occasionally.

Combine flour, baking powder and salt in a separate bowl; add to butter mixture alternately with milk.  Pour into pans. 

Bake oblong for 45-50 minutes, layers 30-35 minutes or until wooden pick inserted in center comes out clean.  Cool.

Frost with French Silk Frosting or your favorite chocolate frosting recipe.  See recipe below.
Another classic Betty Crocker recipe
French Silk Frosting:                            

2 2/3 cup confectioners' sugar
2/3 cup soft butter
2 ounces melted unsweetened chocolate (cooled)
3/4 tsp. vanilla
2 Tbsp. milk

In small mixer bowl, blend sugar, butter, chocolate and vanilla on low speed.  Gradually add milk; beat until smooth and fluffy. 

Makes enough frosting for two 9" layers or three 8" layers.

Variation:  This cake is also delicious with a lemon frosting.


Be encouraged!
God is your source!  Everyone else is just a resource.   -Tony Evans


Sunday, November 29, 2015

Caramel Apple Sheet Cake

Caramel Frosting in every bite! 


It's September and "apple season" is here!  I started looking online and found a photo of Caramel Apple Sheet Cake from "Chef in Training" and I knew I'd found my next dessert!  It looked too good not to try!

The only thing I added was a drizzle of the caramel sauce lightly over the top, and, for those who like their caramel with a bit of salt, I sprinkled a small pinch of Kosher salt on their piece.  

It turned out just like the picture on the website, and it tasted just as good as promised! 

This actually did melt in my mouth!  Thanks, Nikki, from "Chef in Training!"

Ingredients:
2 cups flour plus 2 Tablespoons flour
2 cups sugar
1 teaspoon cinnamon
½ cup butter
1 cup water
½ cup shortening
½ cup buttermilk
½ teaspoon baking soda
2 eggs
1 teaspoon vanilla
2 cups peeled and chopped green apples
 
Frosting:
1/2 cup butter, melted
6 Tbsp. milk
3 1/2 cups confectioners' sugar
1/2 tsp. vanilla
1/8 cup caramel sauce (I use caramel ice cream topping)

In a large mixing bowl, measure flour, sugar and cinnamon and stir to combine. Set aside.
 
In medium sauce pan combine butter, water, and shorting. Bring to a boil. After mixture reaches a boil add it to the flour mixture and stir to combine. Add buttermilk, then baking soda, then eggs, then vanilla in that order, mixing in between each addition. Stir in apples.
 
Pour into a 15x13 inch greased jelly roll pan.

Bake at 400 degrees F for 20 minutes. Let cool for about 10-15 minutes.

While cake is cooling, make frosting by combining butter, and milk in a medium mixing bowl. Microwave until butter is melted. Add powdered sugar, vanilla, and caramel sauce and stir until smooth. Pour frosting evenly over cooled cake.


Be encouraged!
"Do everything without complaining or arguing, so that you may become blameless and pure, children of God without fault in a crooked and depraved generation, in which you shine like stars in the universe." - Philippians 2:14-15

Thursday, October 22, 2015

Homemade Pan Release - Cake Pan Goo

Never buy cooking spray again!
 
I'm not even kidding, this stuff is awesome!  You'll never have cakes stick again! 
 
This homemade "Cake Pan Goo" works better, is cheaper and won't harm your pans. Did you know that brown stuff from the cooking sprays is actually the propellant that they use. A dark pan gets hotter, faster and can dramatically alter the results of your baking to the point of causing burnt bottoms and undercooked middles. 
 
If you bake and cook a lot, then you're going to love having this as part of your necessary staples...and it does work better than cooking sprays, without chemical fumes or effects!
 
Ingredients:

1 Cup Vegetable Oil
1 Cup Crisco
1Cup All Purpose Flour
 
Mix all ingredients in medium bowl and whisk well by hand.  Mixture will be smooth and creamy. Store in an airtight container, refrigerate in hot weather, but refrigeration is NOT required.
 
It does tend to separate slightly upon sitting in your cupboard or refrigerator, so mix before using, then brush pans using a pastry brush or a clean paper towel.
 
When ready to use:
 
With pastry brush or paper towel, coat cake pans with Cake Pan Goo before pouring batter into pan.
 
Let cake cool a few minutes then, watch it flip out of pan perfectly every time.
 
 
"I have chosen the way of truth; I have set my heart on your laws." - Psalm 119:30
 

Saturday, October 17, 2015

Cinnamon Roll Cake

Calling all "Cinnamon Lovers!"
 
 
Okay, so who doesn't love waking up to warm cinnamon rolls and a cup of great tasting coffee?  You do love it?  Me too!  Well, this will give you the great taste of a cinnamon roll without the fuss of rolling dough, filling them, them cutting them into circles...ya-da, ya-da.  You know what I mean, right?
 
Browsing through the website "Chef in Training", I came across this recipe for Cinnamon Roll Cake.  Immediately, my mouth started to water!  It's an easy cake to throw together and you'll get to enjoy it for breakfast, lunch or a snack. 
 
Just sit back, cuddle with your cozy blanket and enjoy this with your favorite hot beverage.  You're going to love it!
 
INGREDIENTS:
 
CAKE:
3 cups flour
¼ tsp. salt
1 cup sugar
4 tsp. baking powder
1½ cups milk
2 eggs
2 tsp. vanilla
½ cup butter, melted
 
TOPPING:
1 cup butter, softened
1 cup brown sugar
2 Tbsp. flour
1 Tbsp. cinnamon
 
GLAZE:
2 cups powdered sugar
5 Tbsp. milk
1 tsp. vanilla
 
Instructions:
 
Cake:
Preheat oven to 350'F.  Spray a 9×13 glass baking pan with cooking spray. Set aside.
 
In an electric or stand mixer add the flour, salt, sugar, baking powder, milk, eggs, and vanilla. Once combined well , slowly stir in the melted butter.
 
Pour into the prepared 9×13 baking pan.
 
For topping:
In a large bowl, cream butter, brown sugar, flour and cinnamon together until well combined and creamy. Drop evenly over the batter by the tablespoonfuls and use a knife to marble/swirl through the cake.
 
Bake at 350' for 35-40 minutes or when a toothpick inserted near the center comes out nearly clean.
 
For Glaze:
In a medium bowl, mix the powdered sugar, milk and vanilla together with a whisk. Drizzle evenly over the warm cake. Serve warm or at room temperature.
 
 
Be encouraged!
"Keep your lives free from the love of money and be content with what you have, because God has said, "Never will I leave you; never will I forsake you."     -Hebrews 13:5

Sunday, June 21, 2015

Orange Creamsicle Poke Cake

Tastes like my favorite childhood dessert!


Oh my word!  I figured this cake would be a refreshing summer dessert, but I had no idea how delicious it was going to taste!  This was the best poke cake yet...and you know how much I like poke cakes.

The frosting, oh yes, the frosting!  Well, I could just devour the frosting all by itself!

It tastes just like those Orange Creamsicle ice cream bars we used to get on the beach in New Jersey, when I was a little girl.  We spent a week each summer in Wildwood with all the family, and they were some of the best times ever.  The only "not so happy" memory I have of those ice cream bars is the time my tongue got stuck to one.  Ever see "A Christmas Story"?  It looked a lot like that famous scene when they triple-dared that poor boy (minus the flag pole).  I was slightly hysterical...crying, screaming and running around trying to unstick my tongue.  Good times, yeah!  Haha!

At least no one will get their tongue stuck to a piece of this cake...I hope!

Ingredients:

Make cake mix as directed on package:
1 (18 ounce) box orange cake mix (Walmart carries Duncan Hines Orange Cake)
  *If you can't find the orange, a white cake is perfectly fine to use.
3 eggs (or as called for by your cake mix)
1⁄3 cup oil (or as called for by your cake mix)
1 cup water (or as called for by your cake mix)
 

Mix together:
1 (6 ounce) box orange Jell-O
1 1/2 cups hot water

1 cup cold water
 

Frosting:
8 ounces cream cheese, softened
1 (3 1/2 ounce) box vanilla instant pudding mix
1 (3 1/2 ounce) box orange Jell-O
1 cup milk
1 teaspoon orange extract
1 tsp. vanilla extract

8 ounces Cool Whip, thawed

Defrost Cool Whip in the refrigerator the night before,

  • Heat oven to 350°F (325°F for dark or nonstick pan). Spray bottom only of 13x9-inch pan with baking spray with flour.
  • In large bowl, beat cake mix, eggs, 1 cup water and the oil with electric mixer on low speed 30 seconds. Beat on medium speed 2 minutes, scraping bowl occasionally. Pour batter into pan.
  • Bake 28 to 33 minutes or until toothpick inserted near center comes out clean. Cool completely in pan on cooling rack, about 1 hour.
  • Poke cake all over with fork or wooden skewer. In medium bowl, pour boiling water on 1 box orange gelatin; stir until gelatin is dissolved. Stir in cold water. Pour gelatin over cake. Run knife around edges of pan to loosen cake. Refrigerate 2 hours.
  • In a large mixing bowl, beat softened cream cheese until smooth with electric hand mixer (or other); add orange Jell-O, instant vanilla pudding, 1 cup milk, orange and vanilla extract.  Immediately beat until smooth and well blended.  (Don't let the Jell-O and vanilla pudding sit or they'll get lumpy).   Fold in Cool Whip.   
Spread over the cake and keep refrigerated until serving.   Garnish with mandarin orange or whipped cream. Refrigerate any leftovers.


Be encouraged!
Praise the Lord because He is good to us, and His love never fails.    -1 Chronicles 16:34

Monday, June 8, 2015

Chocolate Italian Love Cake

That's amore'!


If you need a special dessert, you know, something to fill that sweet craving and still look amazing when served?   Your search is over!  This cake comes together in about 10 minutes, it's so easy to make.  Then, into the oven for an hour, and you have something really spectacular!   

Chocolate Italian Love Cake incorporates chocolate cake, ricotta cheese and a pudding topping that your friends and family will love.   If chocolate isn't your thing, just switch the cake mix and pudding to another flavor, vanilla, lemon or even German Sweet Chocolate. They are all delicious! 

Make it the day prior and let it sit in the refrigerator over-night, and it will taste even better.  You can keep the cake itself, covered, in the fridge until ready to serve and then put the pudding on top or frost it when cooled, and refrigerate.  Be sure to keep any leftovers refrigerated.

Ingredients:
1 pkg. chocolate cake mix (Use your favorite brand, and the ingredients listed to make it)
2 lbs. ricotta cheese
4 eggs
¾ cup sugar
1 tsp. pure vanilla extract
1 (5.1 oz.) package instant chocolate pudding mix
1 cup cold milk

8 oz. Cool Whip

Directions:
Preheat your oven to 350'F.  Spray a 9×13 inch pan with nonstick spray.

In a large bowl, mix together your cake mix according to the directions on the box. Set aside.


In another bow, using a hand mixer, beat together the ricotta cheese, eggs, sugar, and vanilla until smooth.


(The following steps are correct, the layers will reverse during baking.)

Pour the cake batter into the prepared baking dish. Spread to fill the pan evenly. Once the cake batter is in place, carefully pour the cheese mixture evenly over the top of the cake batter. Spread to cover the cake batter as best as you can.

Bake the cake at 350'F. for about 1 hour (mine was done in 45 minutes). Remove from the oven and allow to cool completely before frosting. The layers will switch places during the baking process.


Once the cake is cool, stir the pudding mix and milk together with a whisk until combined. Carefully, fold the Cool Whip into the pudding until blended. (This will be like a chocolate mousse.)


Spread the pudding mixture over the top of the cooled cake or wait until just before serving and put a dollop of "mousse" on top of each piece.  Add a few raspberries and chocolate shavings.  Beautiful presentation!) 

Cover the cake and refrigerate at least 6 hours before serving. (It tastes even better the next day.) 

Refrigerating it overnight will allow the flavors to marry together, and give maximum taste.

Be encouraged!
"Do not be conformed to this world, but be transformed." -Romans 12:2

Monday, June 1, 2015

Black and White Birthday Cake

The birthday cake of my youth!


Growing up, this is the cake we had for all our birthdays and celebrations.  My mom would bake it, assemble it, and then dad would decorate with his little metal flower tube decorator.   You wouldn't believe how beautiful those cakes looked when he was finished...or how good they tasted!  

This past weekend was my husband's birthday, and I haven't made one of these Black and White Cakes since my kids were little.  I figured it's about time!   Not only was he thrilled, but the whole family just loved having "two cakes in one!"

These are the two favorite cakes I use, but you can bake your favorites and assemble them in the same way.  This recipe makes one chocolate, 9" cake and one yellow, 9" cake.  The filling is the one I use for everything and I've never had one better.  I changed the frosting from a cooked white decorator icing to a light chocolate, fluffy one.  It suited the cake perfectly.

Your whole family will love the looks and taste of this wonderful cake!

Bottom Layer: (Chocolate Cake)
Ingredients:


1 1/2 c.  flour
1 c. sugar
1 tsp. baking soda
1/3 tsp. salt
3 Tbsp. unsweetened baking cocoa
6 Tbsp. oil
1 Tbsp. vinegar
1 tsp. vanilla
1 c. cold water

Preheat oven to 350'F.

Put dry ingredients in a bowl, mix lightly with fork to blend.  Make a well in the middle; add liquids; mix well until all ingredients are blended and the batter is smooth. 

Pour into a greased 9" round cake pan.

Bake at 350'F for 25-30 minutes or until toothpick inserted in center comes out clean.

Top Layer: (Yellow Cake)

1 1/4 cup all-purpose flour
1 c. sugar
1 1/2 tsp. baking powder
1/2 tsp. salt
3/4 c. milk
1/3 c. shortening
1 egg
1 tsp. vanilla

Preheat oven to 350'F.  Grease and flour  a 9" round cake pan. 

Measure all ingredients into large mixer bowl.  Blend 1/2 minute on low speed, scraping bowl constantly.  Beat 3 minutes high speed, scraping bowl occasionally.  Pour into pan.

Bake 30-35 minutes or until wooden pick inserted in center comes out clean.  Cool.


Filling: (Mom's Vanilla Cream) 
*You'll only need half of this recipe. 


6 Tbsp. flour
1/2 c. granulated sugar
1/2 tsp. salt
2 eggs
2 c. milk
1 tsp. vanilla
2 Tbsp. butter

Combine flour, sugar, salt and eggs in saucepan and stir until smooth; gradually add milk and continue to stir constantly over medium heat, until  thickened.  If it looks lumpy, use a wire whisk and it will smooth out nicely. 

Add vanilla and butter after pudding has thickened.  Store in refrigerator until ready to use. 


Frosting: (Fluffy Chocolate Frosting)

1 cup milk
1 (3.5 oz.) pkg. instant Jell-O pudding, chocolate
1/4 c. confectioners' sugar
1 tsp. vanilla
1 (8 oz.) container Cool Whip

Pour milk into bowl with instant pudding, sugar and vanilla.   Beat with a wire whip for 2 minutes or electric beater until smooth and well blended.

Fold in Cool Whip until all blended and no streaks remain.  Spread evenly over top and sides of cake. 

This makes a lot of frosting, leftovers can be stored in the refrigerator...or eaten with a spoon!   Tastes like a light chocolate mousse! 

When both cakes have cooled (yes, you can bake them together), place the chocolate one onto a pretty cake plate and use about half the vanilla cream over it.  Now, carefully place the yellow cake on top and your all set to frost it.  Keep finished cake refrigerated.


"It is more blessed to give than to receive."  Acts 20:35